E-Series Heated Bed Replacement
Pulse E-Series Heated Bed Replacement
This guide is meant to help with replacing the Heated Bed on the Pulse E-Series printers. This process will require the following tools:
- 2mm Allen Wrench
- 2.5mm Allen Wrench
- 5.5mm socket or an adjustable wrench
- Flush Cutters
CAUTION: The printer should be unplugged from power for safety reasons.
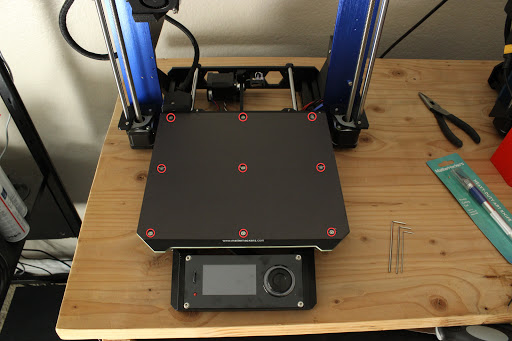
Step 1: Remove the Bed Fixing Screws
Remove the 9 fixing screws using the 2.5mm wrench
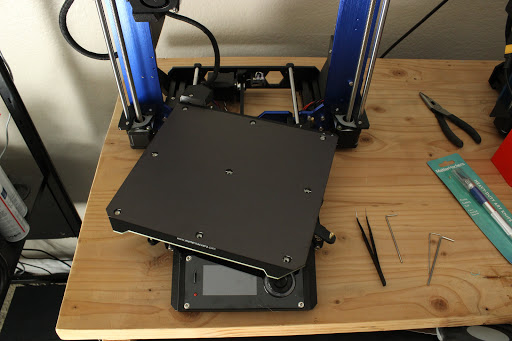
Step 2: Disconnect the Plate
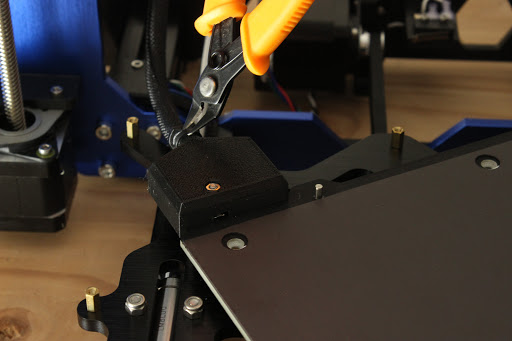
You may want to cut the Zip-Tie from the top of the printed bracket to make the disconnection of the Build Plate easier. It is not required but is done so in this guide. We do not recommend cutting the Zip-Tie from the underside as the wires are exposed and could be damaged.
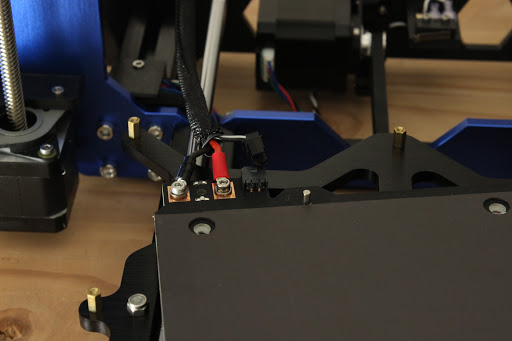
Next, disconnect the Heater and Thermistor connections. The Heater connections are secured by locking 5.5mm nuts, it is recommended to use a socket wrench if available or an adjustable wrench.
Caution: The Heater connections have washers on both sides of the plate. Once the locking nut is removed, the washer on the bottom will be free to move and may fall out. Do not lose this washer!

The Build Plate should be completely free now. Follow these steps in reverse to assemble the bed.